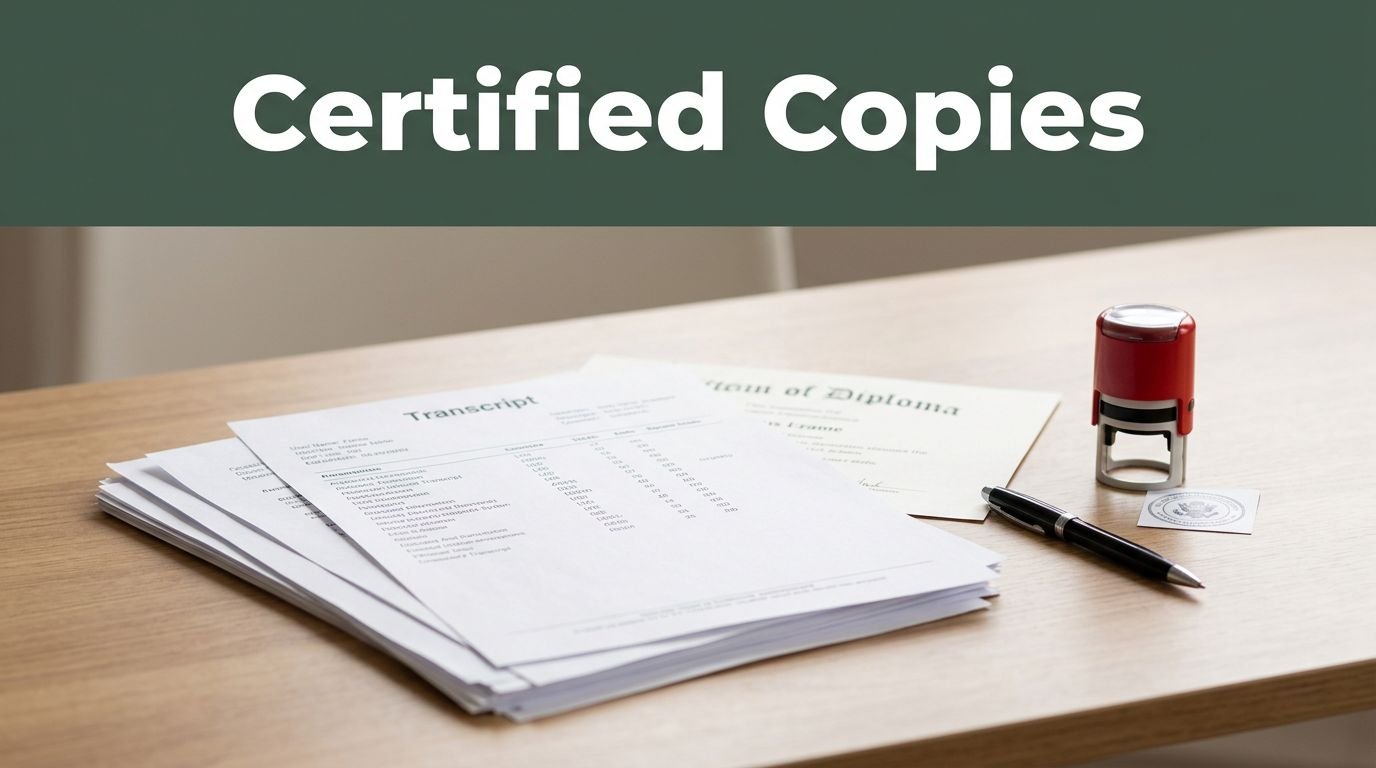
Scholarship applications often require more than an online form and a personal essay. You may also need to submit transcripts, diplomas, identification documents, financial records, recommendation letters, or proof of residency. When a scholarship provider asks for a certified copy, a regular photocopy usually isn’t enough.
Learning how to certify copies of scholarship application documents can help you avoid rejected paperwork, missed deadlines, and last-minute trips to a notary or government office. The exact process depends on your country, the document type, and the scholarship provider’s instructions, so read the application requirements before you start.
1. Understand What a Certified Copy Means
A certified copy is a photocopy that an authorized person has compared with the original document. The certifier confirms that the copy is a complete and accurate reproduction of the original. The copy usually includes the certifier’s signature, the date, an official stamp or seal, and a statement such as “I certify that this is a true and correct copy of the original document.”
A regular photocopy only reproduces the information on the page. It doesn’t prove that someone checked the copy against the original. A scanned document or photograph has the same limitation unless the scholarship provider accepts ordinary digital files.
Scholarship committees request certified copies when they need greater confidence that your records are genuine. This can be especially important for competitive awards, international scholarships, programs that provide large financial grants, and applications that require proof of academic standing or identity.
The wording matters, too. A document notarized for your signature isn’t automatically a certified copy of the document itself. A notary may confirm that you signed a statement, while a certified-copy process confirms that the reproduced document matches the original. Those are different services.
2. Check Which Documents Need Certification
Don’t certify every page in your application unless the scholarship instructions require it. Certification can cost money, take time, and create extra paperwork. Start by making a list of the documents that the scholarship provider identifies as certified, official, notarized, or verified.
Documents that commonly require certification include:
- High school transcripts
- College or university transcripts
- Diplomas and degree certificates
- Professional licenses or training certificates
- Passport identification pages
- Birth certificates
- Proof of citizenship
- Proof of residency
- Immigration or visa records
- Household income statements
- Bank statements
- Tax records
- Financial aid forms
- Letters of recommendation
- Language test certificates
- Disability documentation, when requested
- Name-change documents
The wording in the application can tell you what the committee expects. “Certified copy” generally means a copy checked and signed by an authorized certifier. “Official transcript” often means a transcript sent directly by the school in a sealed envelope or through an approved electronic delivery system. “Notarized copy” can refer to a copy or declaration handled by a notary public.
If the instructions are unclear, contact the scholarship provider before paying for certification. Ask whether the committee accepts a school-issued official transcript, a notarized photocopy, a registrar-certified copy, or a digitally signed PDF. A short written answer can prevent you from submitting the wrong format.
3. Identify an Authorized Certifier in Your Area
The person who can certify a copy depends on local law and the scholarship provider’s rules. Common certifiers include notaries public, commissioners for oaths, lawyers, solicitors, court officials, government employees, school registrars, and officials at embassies or consulates.
A notary public is a common option in the United States. However, notaries don’t have identical powers in every state. Some can certify copies of certain documents, while others can only notarize your signature or administer an oath. In some locations, a notary may require you to sign a written declaration that the copy is accurate instead of certifying the copy directly.
A commissioner for oaths is used in several countries and may be authorized to witness declarations or verify documents. A solicitor, lawyer, or licensed legal professional may also certify copies where local rules permit it.
Your school may be the best choice for academic records. A registrar’s office can often issue an official transcript or certify a copy of a diploma. Some scholarship programs prefer this option because the school is the original source of the academic information.
Government offices, passport agencies, embassies, and consulates may certify identity or citizenship documents. They may not certify every document in your application, so check their services before making an appointment.
Before visiting an official, verify three things:
- The person is currently authorized to certify documents.
- The person can certify the type of document you have.
- The scholarship provider accepts that person’s certification.
You can usually confirm this through the official’s government website, professional directory, school website, or office telephone number. Don’t rely only on an online listing with no current contact information.
4. Gather and Inspect Your Original Documents
You need the original document for comparison unless the certifier or issuing institution gives you different instructions. A photocopy can’t usually be certified against another photocopy. Bring the original transcript, original diploma, original passport, or original record requested by the scholarship provider.
Inspect every original before your appointment. Check that:
- Your full name is visible and spelled correctly.
- Dates and identification numbers are readable.
- Stamps, signatures, and seals aren’t covered.
- Pages aren’t missing.
- The document isn’t torn, water-damaged, or badly faded.
- Any attached page is included.
- The document hasn’t been altered or marked in a way that could raise questions.
Make high-quality copies before the appointment. Use a clear copier or scanner, especially for documents with small print, embossed seals, colored stamps, or security features. Copy both sides when information appears on the back. Include every page if the original is a multi-page document.
Don’t trim the copy so closely that a stamp, seal, signature, or border is cut off. If the original has a raised seal that doesn’t show clearly in a normal photocopy, ask the certifier whether the seal needs to be visible through another method.
5. Organize the Documents in the Required Order
Scholarship committees often provide a document checklist. Use it as your organizing system. Place the documents in the same order as the checklist, unless the provider asks you to use a different order.
Create a simple tracking table with these columns:
Document |
Original available |
Copy made |
Certification needed |
Submitted |
|---|---|---|---|---|
Transcript |
Yes |
Yes |
Yes |
No |
Diploma |
Yes |
Yes |
Yes |
No |
Passport page |
Yes |
Yes |
No |
No |
Financial statement |
Yes |
Yes |
Yes |
No |
Keep originals separate from the copies you plan to submit. You don’t want an official to accidentally mark your original document, and you don’t want to mail an original when the application only requests a certified copy.
Remove paper clips, binder clips, and staples before the appointment if they prevent the official from reviewing each page. Don’t remove a staple that holds an official document together unless you know the document can be separated safely. Some records are considered invalid or incomplete if their pages are detached.
6. Confirm Whether Translation or Additional Authentication Is Required
A certified copy and a certified translation are not the same thing. If your document is written in a language that the scholarship committee doesn’t accept, you may need both a certified copy of the original and a certified translation.
The scholarship instructions may require a translator who belongs to a professional association, a translator’s signed certification, or a notarized translator declaration. In some cases, the issuing school or government office must provide the translation. Don’t assume that a friend, family member, or online translation tool will meet the requirement.
International documents may also need an apostille, legalization, or consular authentication. These processes confirm the authority of the official who signed a document. They are separate from making a certified copy. A scholarship provider may request one, both, or neither.
Check the application instructions for terms such as:
- Certified translation
- Official translation
- Apostille
- Legalization
- Consular authentication
- Embassy certification
- Original language document
- English-language copy
Because requirements differ by country and institution, confirm the process with the scholarship provider or the relevant government office before arranging certification.
7. Schedule the Certification Appointment
Many certifiers accept walk-ins, but an appointment is safer when you have several documents or a deadline. Tell the office how many documents you need certified and what types they are. A simple request for “a certified copy” may not give the office enough information to prepare.
Bring the following items:
- The original documents
- The photocopies
- A government-issued photo ID
- The scholarship instructions
- Any required forms or certification wording
- Payment
- A pen, if the office permits you to complete a declaration
- Extra copies, if you may need more than one submission set
Your identification document should show the name you use in the scholarship application, unless you also have legal proof of a name change. A passport, driver’s license, state ID, or national identity card is commonly accepted, but the office sets its own requirements.
Stay present during the entire certification process. The official may need to compare each page with the original, ask questions, or correct a problem before signing. Don’t leave your original documents unattended.
8. Ask About Fees and Payment Before the Appointment
Certification fees vary by location, document type, number of pages, and type of official. In the United States, a basic notarial act is often subject to a state-set maximum, and the permitted fee may be anywhere from no charge to a modest per-act amount. Mobile notaries may also charge travel fees. School registrars, government offices, lawyers, and embassies use their own fee schedules.
Before your visit, ask:
- Is the fee charged per document, per signature, per page, or per certification?
- Is there a separate fee for additional copies?
- Is there a travel, appointment, printing, or administrative charge?
- Does the office accept cash, card, check, or electronic payment?
- Will you receive a receipt?
- Is same-day service available?
A fee schedule may list one price for notarizing a signature and another price for certifying a copy. Don’t assume the lower price applies to your request. If you’re submitting applications to several scholarship programs, ask whether one certification can cover multiple copies or whether every copy needs a separate stamp and signature.
Keep your receipt with your application records. It won’t usually be part of the scholarship submission, but it can help if you need to request a refund, explain a delay, or prove when the service was completed.
9. Make Sure the Certification Contains the Required Details
A properly certified copy usually includes more than a signature. Review the page before you leave the office. The certification should be attached to, written on, or clearly associated with the copy.
Common details include:
- A statement that the copy is a true or accurate copy of the original
- The certifier’s signature
- The certifier’s printed name
- The date of certification
- The certifier’s title or professional status
- An official stamp or seal
- A commission, license, or registration number, where applicable
- The office address or contact information
- An expiration date, when the official’s authorization uses one
A sample statement may read:
“I certify that this is a true and correct copy of the original document presented to me.”
The exact words can vary. Use the wording required by the scholarship provider or local law when specific wording is provided. Don’t write the certification statement yourself unless the official instructs you to do so.
Check that the stamp is dark enough to read and that the signature doesn’t cover important information. If the stamp is placed on a separate certificate, make sure the certificate is securely attached to the copy. Some offices use a seal across the page and certificate to show that they belong together.
10. Handle Transcripts and Academic Records Through the Registrar
Transcripts are among the most frequently requested scholarship documents, but they aren’t always handled like ordinary photocopies. Many scholarship committees want an official transcript issued directly by your high school, college, or university.
Contact the registrar’s office and ask which options are available. You may be able to request:
- A sealed paper transcript
- A transcript sent directly to the scholarship committee
- An electronic transcript from an approved service
- A registrar-certified copy
- A transcript stamped and signed by the school
- A student copy followed by certification from an authorized official
Don’t open a sealed transcript if the scholarship provider requires the seal to remain intact. An opened envelope may no longer count as official. If you need to upload the transcript, ask whether the committee accepts a scan of a sealed document or requires delivery through a particular electronic service.
Academic records may use different names for the same type of document. A grade report, unofficial transcript, enrollment record, and official transcript aren’t always interchangeable. Follow the scholarship provider’s exact wording.
For diplomas and degree certificates, the issuing school may be able to provide a replacement, official confirmation, or certified copy. This can be more reliable than taking a personal copy to a general notary.
11. Treat Recommendation Letters and Financial Records Differently
Letters of recommendation usually have their own submission rules. A scholarship provider may require the recommender to upload the letter directly, send it by email from an institutional address, or place it in a sealed envelope with a signature across the seal. A certified photocopy may not meet the requirement.
If the instructions ask for a certified recommendation letter, start with the original signed letter. Ask the recommender whether the letter should be signed in ink, printed on institutional letterhead, sealed, or sent directly to the committee. Don’t open a confidential letter unless the scholarship provider says you may.
Financial records also vary. A bank statement may need a bank stamp, an authorized bank employee’s signature, or a letter printed on bank letterhead. A notarized copy of an ordinary statement may not prove that the bank issued it.
Check whether the scholarship requires:
- A recent statement
- A specific number of months
- The account holder’s name
- The institution’s name and contact information
- A balance in a particular currency
- A certified translation
- A signed declaration of household income
Remove account numbers or other sensitive information only when the scholarship provider permits redaction. A missing account holder name or balance may cause the document to be rejected.
12. Certify Passport and Identity Document Copies Carefully
When a scholarship provider asks for a passport copy, it usually means the biographical page. This is the page with your photograph, name, nationality, passport number, date of birth, and expiration date. Copy the full page, including its edges and machine-readable zone.
Don’t cut off the passport number, photograph, signature, security pattern, or lower lines of printed characters. If the passport contains a relevant visa, entry stamp, or residence permit, the instructions may require those pages as well.
Ask the certifier whether they can certify passport copies. Some offices can do this, while others may direct you to a passport authority, lawyer, notary, embassy, or government office. If the document is for an international scholarship, confirm whether the committee needs a notarized copy, a certified true copy, or a scan of the passport.
Never mail your passport unless the scholarship provider or government authority specifically requires the original. A certified copy is normally used to reduce the need to send an original identity document.
13. Check Whether Electronic Certification Is Accepted
Some scholarship providers accept digitally signed documents, electronic notarization, or secure PDF files. Others require a paper copy with a physical stamp and handwritten signature. A PDF scan of a stamped page may also be treated differently from a document that was certified electronically.
Ask the scholarship provider whether it accepts:
- A scanned certified copy
- A digitally certified PDF
- Remote online notarization
- An electronic signature
- A PDF/A file
- A secure document with a verification link
- A transcript sent through an approved electronic service
If you submit a digital file, scan it at a readable resolution. Make sure every page is included and arranged in the correct order. Save the file as a PDF unless the instructions specify another format.
Don’t flatten or edit a digitally signed document after certification. Changes can invalidate the signature or break the verification record. Keep the original electronic file, not just a screenshot or printed copy. If the file has a validation panel, certificate details, or verification code, leave those features intact.
Use a clear filename, such as LastName_FirstName_Certified_Transcript.pdf. Avoid spaces and unusual symbols if the upload system has strict file requirements. Check the file size limit before uploading.
14. Avoid Common Reasons for Rejection
Certified copies are often rejected because a small detail is missing. Review every page before submission, especially when several people or offices handled the documents.
Common problems include:
- The copy wasn’t compared with the original.
- The certifier wasn’t authorized for that document.
- The certification statement is missing.
- The date is missing or too old.
- The stamp is faint or unreadable.
- The signature doesn’t match the official’s name or seal.
- The certifier signed the wrong page.
- One page of a multi-page document is missing.
- The copy is cropped.
- The document is in the wrong language.
- The translation isn’t certified.
- A sealed transcript was opened.
- The scholarship provider required an original instead.
- A digital file was uploaded in an unsupported format.
- The certification expired before submission.
- The applicant certified their own copy.
Self-certification usually isn’t accepted because you can’t independently verify your own document. Writing “I certify this is a true copy” on a photocopy and signing it yourself doesn’t replace certification by an authorized official.
Also check whether the scholarship provider has a time limit. Some applications accept a certified copy completed within the past three or six months. Others don’t set a date limit. Use the most recent certification required by the instructions.
15. Package and Submit the Certified Copies Correctly
Use a clean, durable envelope that protects the documents from moisture and bending. Place a sheet of cardboard inside the envelope if the packet is likely to be folded during transit. Don’t use adhesive, tape, or staples on the certified copies unless the scholarship provider asks for them.
Keep the documents flat whenever possible. If you need to mail several pages, arrange them in the requested order and place a simple cover sheet on top. The cover sheet can include your name, application number, scholarship name, email address, and a list of enclosed documents.
Before sealing the envelope, check:
- Your name is correct on every document.
- Every required page is included.
- Each copy has the required signature.
- Each copy has the required stamp or seal.
- The certification date is visible.
- The certifier’s name and title are readable.
- Translations are attached where required.
- The documents are in the requested order.
- The envelope is addressed correctly.
- The deadline allows enough delivery time.
Use tracking and delivery confirmation when mailing documents. Keep a scan or photocopy of the complete submission packet, the mailing receipt, and the tracking number. If the committee says it didn’t receive your documents, you’ll have a clear record of what you sent and when.
For online submissions, save the confirmation page or email after uploading the files. Write down the upload date and application reference number.
16. Resolve Problems Before the Deadline
An official may refuse to certify a document because the law doesn’t permit that type of certification, the original is damaged, the copy is incomplete, or the document belongs to a category that requires a different process. A refusal doesn’t necessarily mean your application is in trouble. Ask which office or professional can handle the document instead.
If an original is lost, contact the issuing institution as soon as possible. A school, government agency, testing organization, or bank may issue a replacement or official verification letter. Replacement processing can take days or weeks, so don’t wait until the application deadline.
If a certified copy is misplaced, ask the certifier whether the office keeps a record of the transaction. You may need to have another copy certified. Don’t alter the date, stamp, or signature on an existing copy.
When a delay could affect your application, contact the scholarship committee in writing. Include your name, application number, document involved, expected delivery date, and a short explanation. Ask whether you may submit a receipt, replacement request, or unofficial copy temporarily. Keep the message professional and save the response.
17. Keep a Certification Record for Future Applications
Many scholarship applications request similar documents, so a good record can save you time. Store digital scans of your certified copies in a secure folder, but remember that a previous certification may not satisfy a new scholarship’s rules.
Create a document log that records:
- Document name
- Date issued
- Date certified
- Name and title of certifier
- Office contact information
- Number of certified copies
- Scholarship submitted to
- Expiration or age limit
- Tracking number, if mailed
Protect personal information with a strong password and limit access to people who need it. Certified copies can contain passport numbers, birth dates, addresses, financial information, and school records. Don’t upload them to an unverified website or send them through an unknown service.
ScholarshipVaults can help you organize scholarship searches, deadlines, and application requirements, but each scholarship provider sets its own document rules. Use the listing and the official scholarship application as your reference for current submission requirements.
Conclusion
Knowing how to certify copies of scholarship application documents helps you submit records in the format a committee expects. Start by identifying the exact documents that need certification, then confirm which official can certify each one. Gather the originals, make clear copies, bring valid identification, and check every stamp, signature, date, and certification statement before you leave the appointment.
Academic records may need to come directly from a registrar, financial documents may need a bank stamp, and international documents may require translation or authentication. Digital submissions also have separate rules. When you match the certification process to the scholarship provider’s instructions, your documents are easier for the committee to verify and less likely to be returned.
This post may contain affiliate links. If you make a purchase through these links, I may earn a small commission at no extra cost to you.